Welcome to the “Getting Started” tutorial for Landing Pages! In this tutorial, you'll learn how to create a new landing page and publish it. Before you can create a landing page and publish it, you must set up the domain for the page.
To go to the Landing Pages page
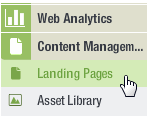
In the left navigation bar, click Content Management, and then click Landing Pages.

To create a new landing page
1. Click the Add button.

This takes you to the first page in the landing page creation process: Select Template. There are three pages total:
1. Select Template
2. Edit Page
3. Publish Page
The title bar at the top of the panel tells you which page you are on:

The Select Template Page
To create the landing page name
In the Set Page Name box, type a name.

NOTE The page name is for internal user only and will not be displayed to customers. You can use the Search feature to find pages you've created based on this name.
To choose a template
Click one of the thumbnails that appear in the right side of the panel. If you want a template that provides the underlying HTML for the page, but no text or graphics, choose the Blank template.
To see more thumbnails, click the right-pointing arrow:

When you are finished with the Select Template page, click the Continue button.

The Edit Page
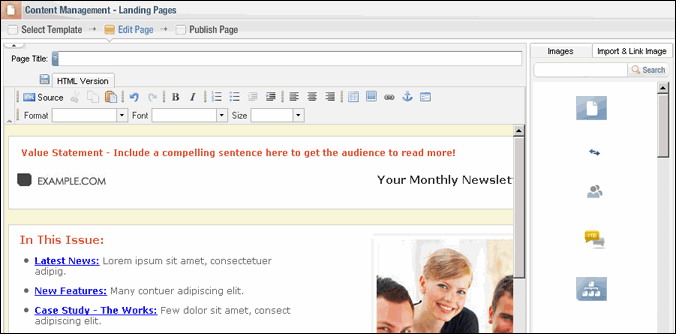
On the Edit Page, you can add a page title and edit the content of your page. You can also add images from the Asset Library.

The Page Title
This is what will appear at the top of each landing page in your browser. Limit your name to 200 characters or less.
To create a page title
Click the Page Title field, and then type a title.
Inserting Images from the Asset Library
The right side of the Edit Page screen displays a panel containing assets from the Asset Library. You can insert images from this panel.

The HTML Editor
In the HTML Editor, you can create new content or edit the content you added when you chose a source on the Select Template screen. The Editor works much like a word processor: you type text and then change its format by selecting it and choosing various commands. The difference, of course, is that the Editor produces HTML.
The Toolbar and Workspace
The toolbar contains features that are similar to those found in other web design programs. You can do things like add images and forms and create web links.

You can learn more about the individual tools on the toolbar here.
Forms
One of the most important features of the HTML Editor as far as landing pages are concerned is the ability to add a form.
To add a form
1. Click the page in the location you want the form to appear.
2. On the toolbar, click the Insert Form button.

3. Choose the options you want in the Insert Form dialog (learn more).
When you are finished with the Edit Page, click the Continue button.

The Publish Page
On the Publish Page, you can choose the domain to publish to and the path.
To choose the domain
Click the Domain drop-down list, and then choose the domain you want.
To choose the path
The Path field should display the most likely path to the page--typically, the page title you assigned on the Edit Page. You can click the text in the field and make changes.
To publish the page
Click the Publish button. The page that displays next gives you the option to copy your landing page URL to the clipboard.
NOTE The URL of your published page will be
http://<domain>/ps/<path>
Special characters are not allowed in the path.
Viewing Metrics for Your Landing Pages
After you publish your landing page, you will want to keep track of views and conversions. You can do this on the Landing Pages page. On this page you can also:
To go to the Landing Pages page
In the left navigation bar, click Content Management, and then click Landing Pages.

View an overview of the Landing Pages page.